
Category Based Ticket Type
Assign different ticket types based on event categories for better organization.
Overview
This add-on lets you group the ticket types of an event into ticket categories, for example Hall 01, Hall 02 or VIP. On the event page, visitors first choose a category and then pick tickets from it. The category name is also shown with each ticket in the cart and order.
Requirements
- Event Booking Manager for WooCommerce (WpEvently)
- WooCommerce
If either plugin is inactive, the add-on shows an admin notice and does not load.
Installation
- Download the add-on zip from your account.
- Go to Plugins → Add New → Upload Plugin.
- Upload the zip and click Install Now.
- Click Activate. A new Ticket Category item appears under the Events menu.
Step 1: Create ticket categories
- Go to Events → Ticket Category.
- Fill in the Add New Ticket Category form and click Add New Ticket Category.
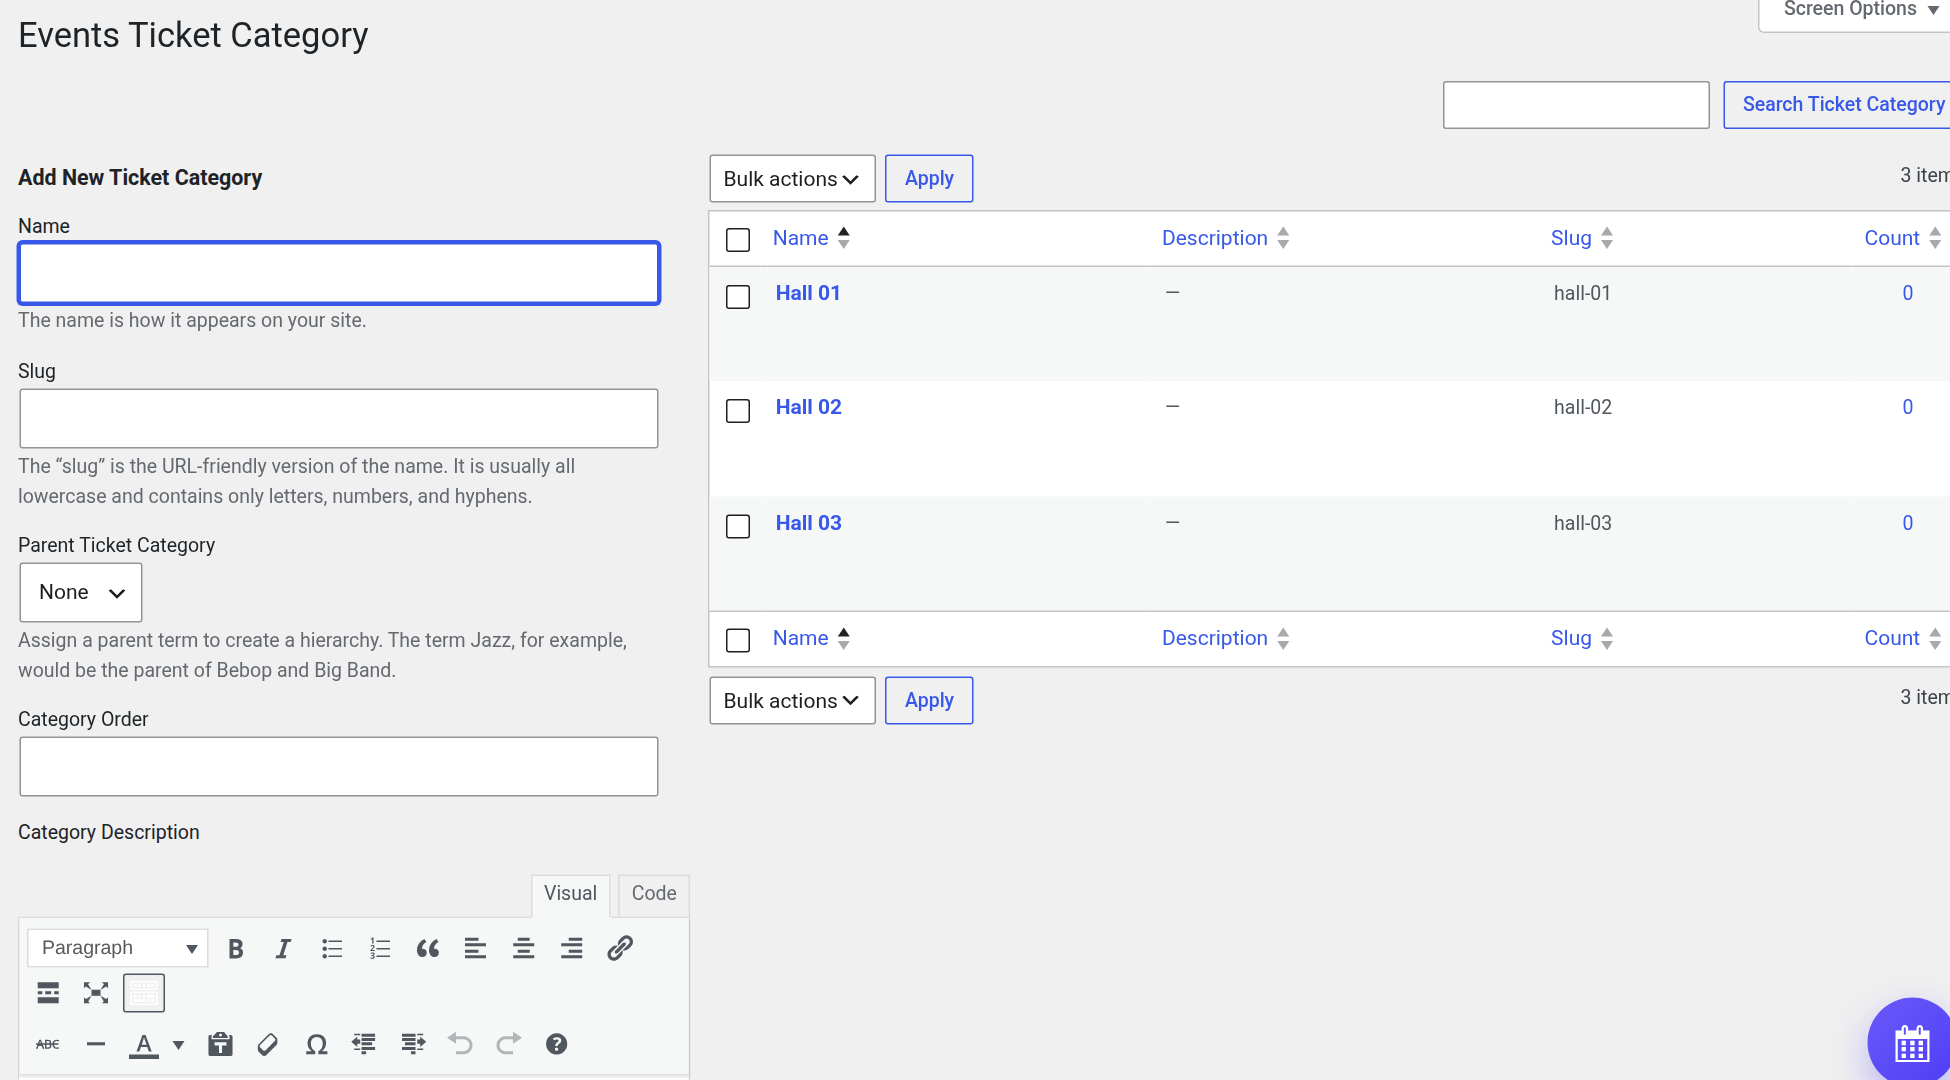
| Field | What it does |
|---|---|
| Name | The category name. It is shown on the category card on the event page and next to the ticket in the cart. |
| Slug | URL-friendly version of the name. Optional. |
| Parent Ticket Category | Optional WordPress parent term. |
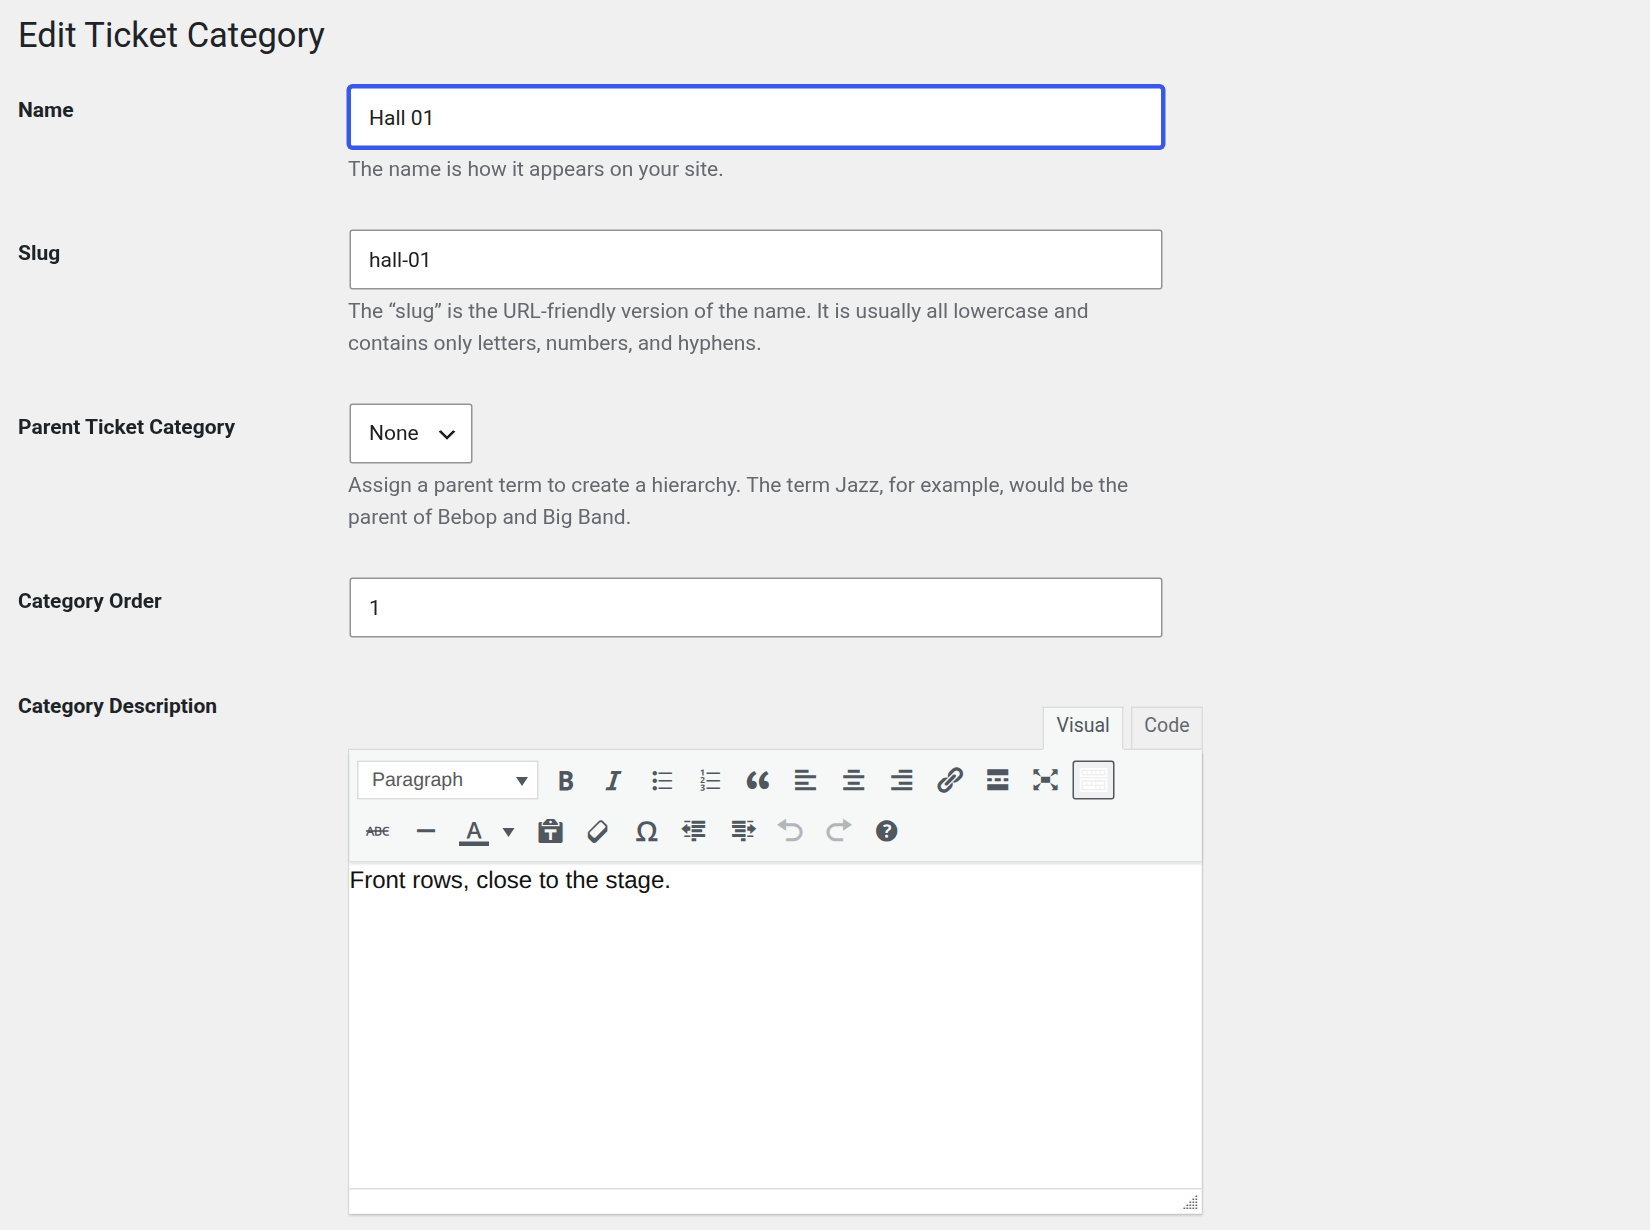
| Category Order | A number that sets the order of the category cards on the event page. Lower numbers appear first, so use 1, 2, 3 to control the sequence. |
| Category Description | A short text shown inside the category card on the event page. It supports basic formatting and links. |
To change a category later, click its name in the list. Category Order and Category Description are on the edit screen.
Step 2: Turn on categories for an event
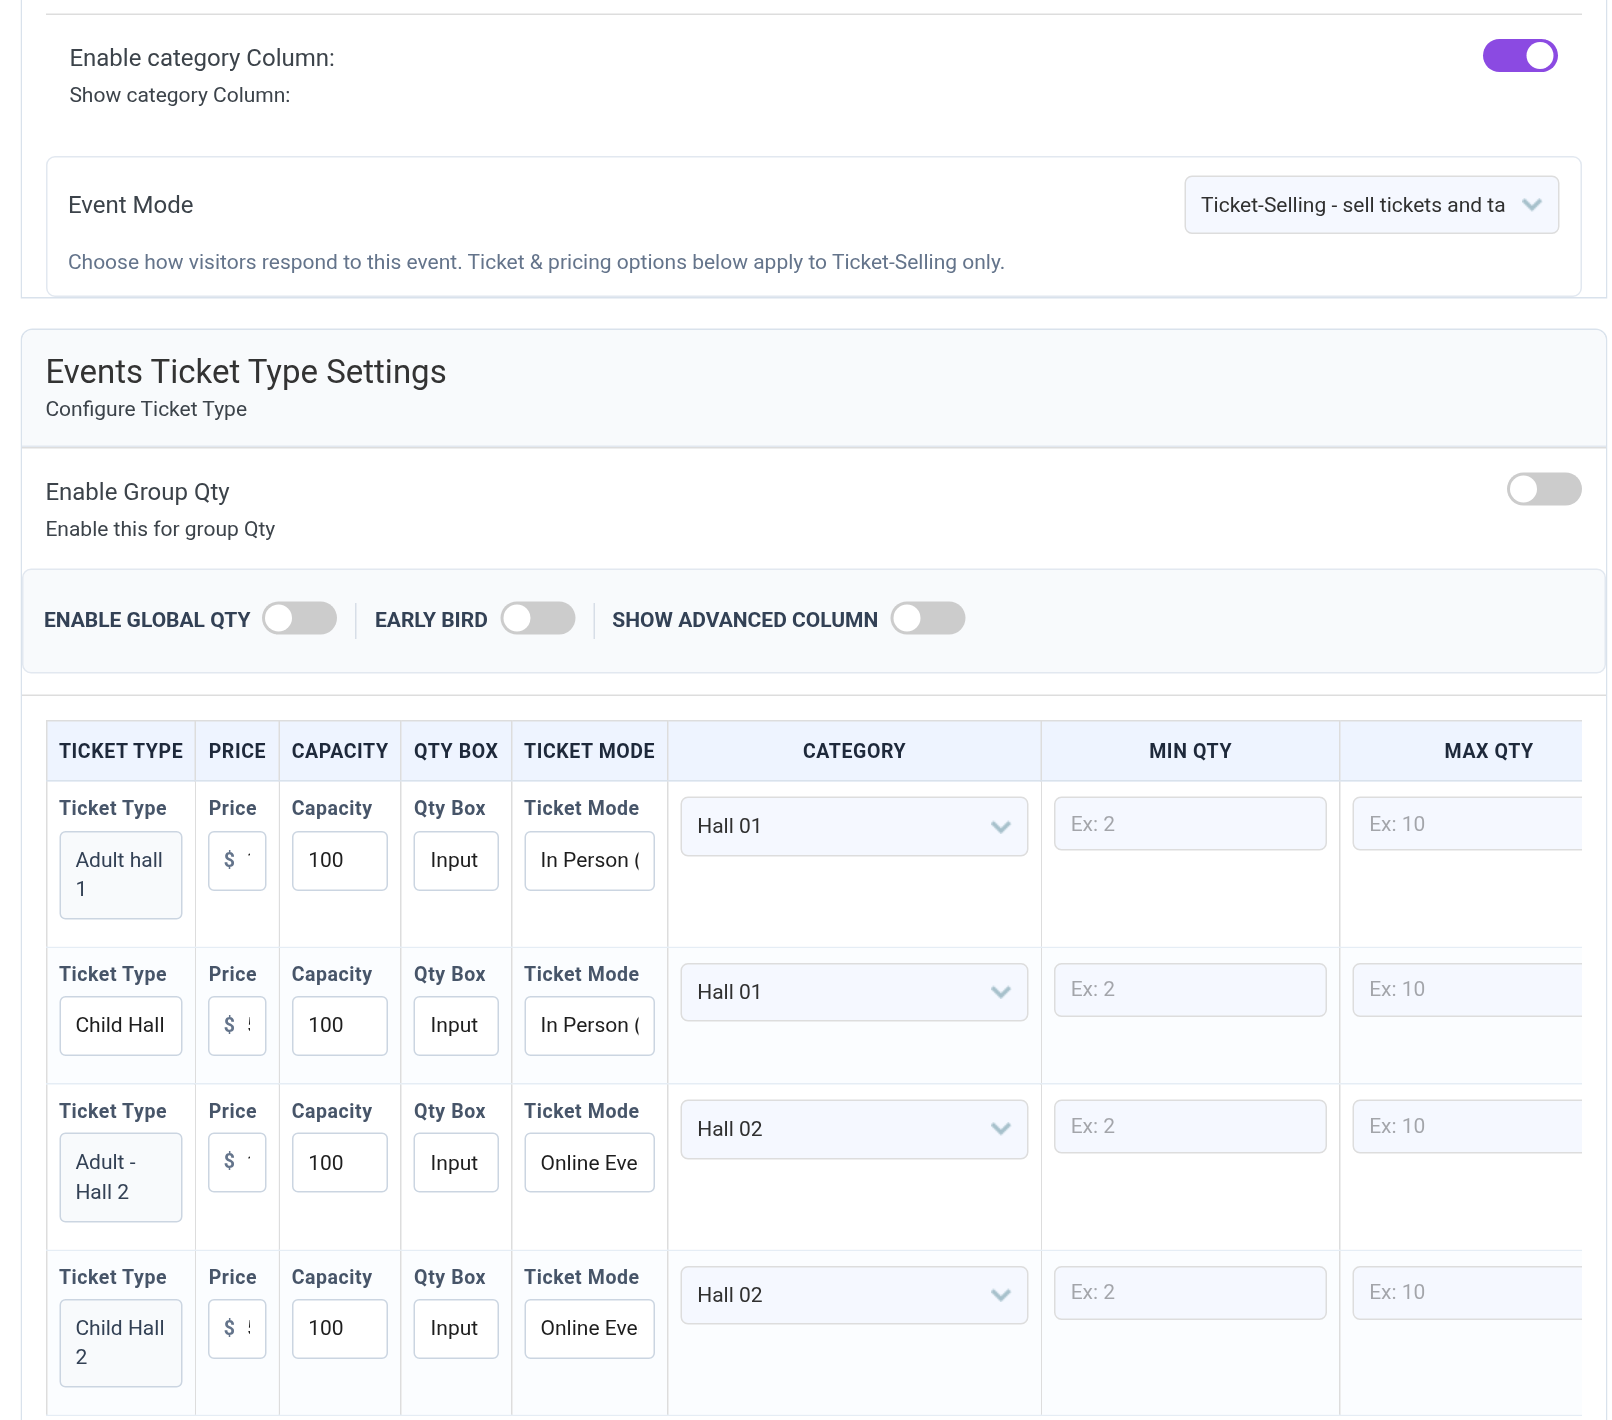
- Open the event and go to the Ticket & Pricing settings.
- Switch on Enable category Column. A Category column is added to the ticket type table.
- For every ticket type, choose a category from the Category dropdown (the first option is Please Select Ticket Category).
- Click Update.
Important:
- When Enable category Column is on, a ticket type without a category is not shown on the event page. Give every ticket type a category.
- The Category dropdown is part of the full ticket table. If you do not see it in the new Modern editor, open the event with the classic editor: Events → Events Settings → General Settings → Edit Screen → Classic Mode.
What visitors see
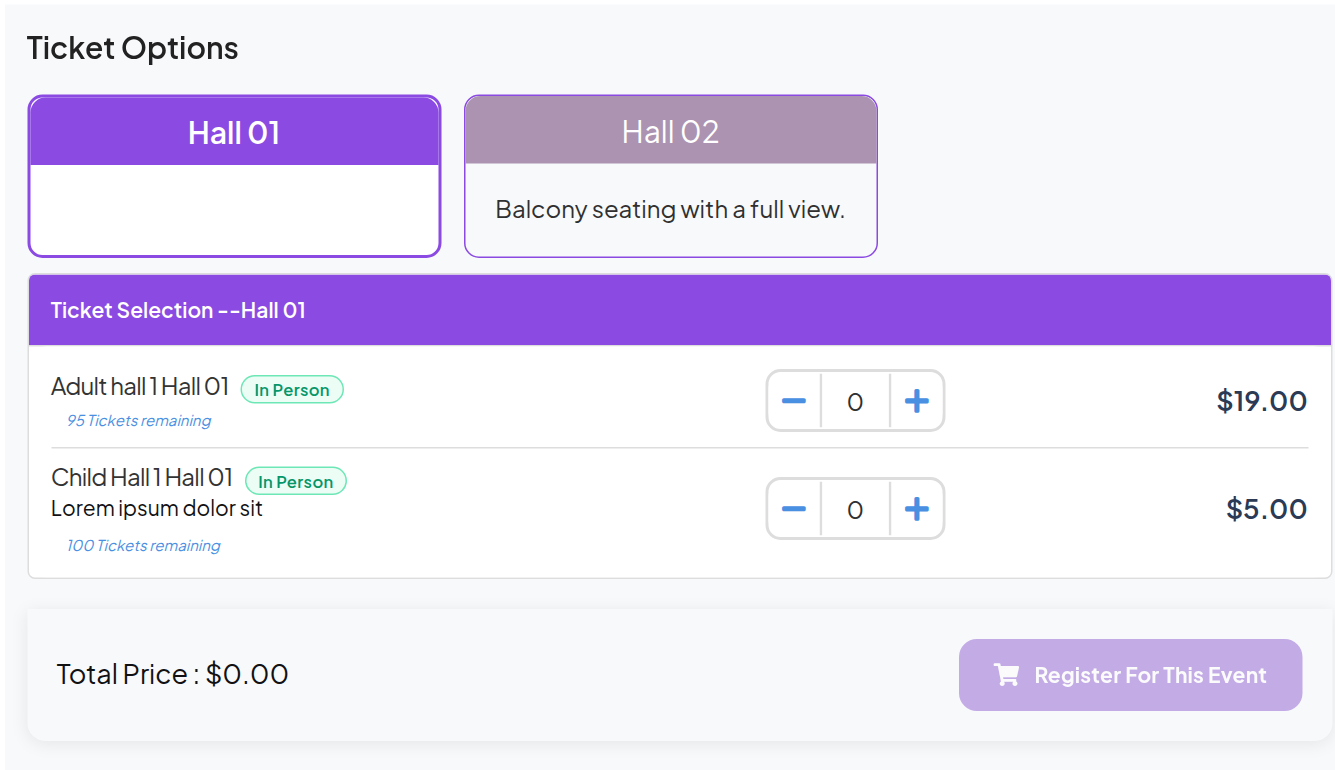
On the event page, the Ticket Options section shows one card per category, with its description. Clicking a card shows the ticket types of that category under Ticket Selection — Category name. Visitors choose quantities and click Register For This Event as usual.
In the cart, checkout and order details, each ticket shows a Category line with the chosen category.
Turn categories off
Switch off Enable category Column on the event and update it. The event goes back to the normal ticket list. The categories you created are kept.
Purchase
This addon is available for purchase from the MagePeople website.